We having an openday for our student on April 30th of 2022 for VR MSc
There is a Postgraudate Virtual Information Session in the morning of the same morning
We having an openday for our student on April 30th of 2022 for VR MSc
There is a Postgraudate Virtual Information Session in the morning of the same morning
Eye-tracking is set to become an important VR hardware feature over the next few years, offering many benefits including greater immersion, new analytical possibilities, and better performance. With the recent release of the Vive Pro Eye, sophisticated eye tracking is now available built-in to a commercial VR headset for the first time. In this blog post I will show you the steps required to set up eye tracking with the Vive Pro Eye using Unity.
First, create a new Unity project using the 3D template. For this example we are using Unity 2019.2.0f1. Once the project has finished setting up, import the SteamVR Plugin from the Unity Asset Store (https://assetstore.unity.com/packages/tools/integration/steamvr-plugin-32647). Once imported, accept the recommended project settings when prompted.
Next go to the download section of the HTC developer website https://hub.vive.com/en-US/download (you may need to sign up to gain access). From here download and install VIVE_SRanipalInstaller_1.0.3.0.msi. After this, download SRanipal_SDK_1.0.1.0_Eye.zip and extract the contents. Within this folder you will find a Unity package file. Double click it and Unity will prompt you to import into your open project.
After importing the package open the EyeSample scene contained within the ViveSR. This scene will allow you see you the eye tracking works in a simple environment. If the tracking doesn’t seem accurate you can launch the calibration settings from the Unity game window when play mode is active. For additional information on how to use Vive eye tracking for your project, checkout the PDF in the SRanipal_SDK_1.0.1.0_Eye folder.
When using a headset that features eye tracking, we can implement foveated rendering to increase rendering performance. Vive provide their own implementation of foveated which is available on the Unity Asset Store (https://assetstore.unity.com/packages/tools/particles-effects/vive-foveated-rendering-145635). After importing the package, go to the Unity Player settings and add “USE_SRANIPAL” in the Scripting Define Symbols field. Then simply add the ViveFoveatedRendering.cs script on to the VR camera in your scene. To ensure that foveated rendering is working correctly, add ViveFoveatedVisualizer.cs to your camera. You should see the foveated targets following your eyes as you move them.
In the run up to the Round Table on the 28th we will be releasing videos from the conference.
The schedule
13/11/2018 10 am GMT
VR4HE – Professor Danaë Stanton Fraser keynote
https://www.youtube.com/watch?v=Mm0m97w2TEg&t=0s&list=PLiwmQZ8bVG6TGFbSRt1Zo5OTs-wJ0E–F&index=2
14/11/2018 10 am GMT
VR4HE – Dr Marc Holmes how VR can be used in HE and introduction
https://www.youtube.com/watch?v=SEmPEJrcdSs&list=PLiwmQZ8bVG6TGFbSRt1Zo5OTs-wJ0E–F&index=2
14/11/2018 2 pm GMT
VR4HE – To infinity and beyond – Dr Catherine Grove & Dr James Holness
https://www.youtube.com/watch?v=XEc7MfJqs7A&list=PLiwmQZ8bVG6TGFbSRt1Zo5OTs-wJ0E–F&index=3
15/11/2018 10 am GMT
VR4HE – Using VR to develop empathy of mental health – Mrs Lorna Saunder
https://www.youtube.com/watch?v=supt35LoQzM&index=4&list=PLiwmQZ8bVG6TGFbSRt1Zo5OTs-wJ0E–F
15/11/2018 2 pm GMT
VR4HE – Interactive materials for Health, Social Care and Education – Mrs Sian Shaw
https://www.youtube.com/watch?v=3kZ86wXJMLg&list=PLiwmQZ8bVG6TGFbSRt1Zo5OTs-wJ0E–F&index=5
16/11/2018 10 am GMT
VR4HE – Exploring geomorphological concepts in virtual reality – Dr Gareth Young
https://www.youtube.com/watch?v=hfaTyBWDQto&list=PLiwmQZ8bVG6TGFbSRt1Zo5OTs-wJ0E–F&index=6
16/11/2018 2pm GMT
VR4HE – VR in Construction – Dr Patricia Xavier
https://www.youtube.com/watch?v=E59IIog0DN0&list=PLiwmQZ8bVG6TGFbSRt1Zo5OTs-wJ0E–F&index=7
19/11/2018 10am GMT
VR4HE – Can VR clinical scenarios improve medical students’ learning? – Dr Mohammed Nasif Mahmood
https://www.youtube.com/watch?v=O-l54pr5TQM&index=8&list=PLiwmQZ8bVG6TGFbSRt1Zo5OTs-wJ0E–F
19/11/2018 2pm GMT
VR4HE – Teaching anatomy through VR – Dr Laura Mason & Dr Marc Holmes
https://www.youtube.com/watch?v=jzLn2906Yis&index=9&list=PLiwmQZ8bVG6TGFbSRt1Zo5OTs-wJ0E–F
20/11/2018 10 am GMT
VR4HE – Teaching empathy by simulated practice in optometry. The TESPO project – Dr Irene Ctori
https://www.youtube.com/watch?v=VwbDXXvwkp0&index=10&list=PLiwmQZ8bVG6TGFbSRt1Zo5OTs-wJ0E–F
20/11/2018 2pm GMT
VR4HE – Virtual Experiences of being an older adult – Dr Jo Hudson & Taylor Waters
https://www.youtube.com/watch?v=GbLQgeceKCk&index=11&list=PLiwmQZ8bVG6TGFbSRt1Zo5OTs-wJ0E–F
21/11/2018 10 am GMT
VR4HE – : Providing Transformative ‘Exceptional Human Experiences’ – Dr.Ciarán O’Keeffe
https://www.youtube.com/watch?v=NGvAXzEBFgE&list=PLiwmQZ8bVG6TGFbSRt1Zo5OTs-wJ0E–F&index=12
21/11/2018 2 pm GMT
VR4HE – Virtual Reality for Learning Social Skills – Dr Marco Gillies
https://www.youtube.com/watch?v=axcH8rnUbcM&index=13&list=PLiwmQZ8bVG6TGFbSRt1Zo5OTs-wJ0E–F
22/11/2018 10 am
VR4HE – Virtual Reality in STEM teaching – Samantha Chester & Aaran Grimley
https://www.youtube.com/watch?v=rJoMQBHnkvU&list=PLiwmQZ8bVG6TGFbSRt1Zo5OTs-wJ0E–F&index=14
22/11/2018 2 pm
VR4HE – Can VR improve auditing? – Mrs Terry Filer
https://www.youtube.com/watch?v=IviF9eyDvrE&index=15&list=PLiwmQZ8bVG6TGFbSRt1Zo5OTs-wJ0E–F
23/11/2018 10am
VR4HE – Virtual student exchange and the use of VR in Syrian refugee camps – Mr Henry Dawson
https://www.youtube.com/watch?v=BfHn2mql65Q&list=PLiwmQZ8bVG6TGFbSRt1Zo5OTs-wJ0E–F&index=16
23/11/2018 2 pm
VR4HE – Teaching VR Pedagogical Approaches and Best Practices – James Michael Maltby
https://www.youtube.com/watch?v=ty8XYqrIkfg&list=PLiwmQZ8bVG6TGFbSRt1Zo5OTs-wJ0E–F&index=17
26/11/2018 10 am
VR4HE – Step away from the CAD station – by Dr Will Harrison and Peter Dorrington
https://www.youtube.com/watch?v=KzOHY7rHT3M&index=18&list=PLiwmQZ8bVG6TGFbSRt1Zo5OTs-wJ0E–F
26/11/2018 2pm
HE4VR – Overcoming the barriers to VR in higher education – Dr Leighton Evans
https://www.youtube.com/watch?v=3G2bRrvnluw&list=PLiwmQZ8bVG6TGFbSRt1Zo5OTs-wJ0E–F&index=19
27/11/2018 10 am
VR4HE – Professor Astid Ensslin
https://www.youtube.com/watch?v=lRH10U0-gTg&index=20&list=PLiwmQZ8bVG6TGFbSRt1Zo5OTs-wJ0E–F
28/11/2018 3pm Sansar Round Table. Link to follow.
VRTK with Unity 2017.4
This guide describes the process of setting up VRTK to work with Unity using Steam VR.
Compatible headsets for this guide-
This guide is also available as a YouTube video:
VRTK is a VR Toolkit for rapidly building VR solutions in Unity. As of November 2018, the most recent of VRTK found on the Unity Asset Store is no longer compatible with the latest versions Unity, Steam VR for Unity (Steam VR 2.0) or Windows Mixed Reality headsets.
To get around these limitations we will be using the latest version of VRTK, and older versions of Steam VR and Unity.
Step 1– Install Unity
VRTK works most reliably with the Unity 2017.4 LTS releases. The easiest way to install Unity is by downloading the Unity Hub, available here https://store.unity.com/download?ref=personal
From within the Install section of Unity Hub, download the most recent version of 2017.4 LTS, which at time of writing is 2017.4.14. If there is no 2017.4 version available, download directly from the Unity website here: https://unity3d.com/unity/qa/lts-releases After Unity has installed, create a new project.
Step 2 – Install VRTK
Download VRTK as a zip file by using the green download button on the VRTK GitHub page, https://github.com/thestonefox/VRTK . From within Unity, right click the ‘Assets’ folder and select, ‘Show in explorer’. Replace the ‘Assets’ and ‘Project Settings’ folders with the versions from the VRTK zip folder. Clicking back on Unity will now import VRTK into your project.
Step 3 – Install Steam VR
Download the Steam VR 1.2.3 Unity package by visiting this link https://github.com/ValveSoftware/steamvr_unity_plugin/releases/download/1.2.3/SteamVR.Plugin.unitypackage In Unity, import this package by clicking on the Assets menu > Import Package > Custom package and selecting the Steam VR Unity package.
Step 4 – Configure VR SDKs
Configure the necessary VR SDKs within Unity by clicking on the Edit Menu > Project Settings > Player. From here click on XR Settings and make sure ‘Virtual Reality Supported’ is ticked. Now add Open VR to the list of VR SDKs if it is not already there. If you are going to be using an Oculus headset, add the Oculus SDK here too.
Step 5 – Testing
Unity should now be setup correctly for use with VRTK. To test, make sure your VR headset is connected and open one of the example scenes found in the VRTK/Examples folder. Click the Unity play button and you should be able to interact with the scene.
Wendy Harris Oxwich Focus Group
The app is a series of photosphere taken around a Oxwich bay the idea is to help remind you of the route, geography and plants you found on your field work.
This cardboard app is available to iPhone and Android users.
Android
https://www.dropbox.com/s/r1zwh8iqjucdfjm/Oxwich20180606.apk?dl=0
Oculus Go
https://www.dropbox.com/s/vat90p5kf7z7yxr/Oxwich20180606Oculus.apk?dl=0
iPhone users
If you got this app message from apple test flight please download test flight install the app if not contract Marc or Wendy to be added to test flight
Instructions
Please come along to the session on the 2018 06 14 for the focus group
Controls.
Place the red ring over objects to click them. you can click on:
Wendy Harris Oxwich Focus Group
The app is a series of photosphere taken around a Oxwich bay the idea is to help remind you of the route, geography and plants you found on your field work.
This cardboard app is available to iPhone and Android users.
Android
please and install the app on your android phone
iPhone users
If you got this app message from apple test flight please download test flight install the app if not contract Marc or Wendy
Instructions
Please come along to the feedback session on the 2017 12 01 for the focus group
Controls.
Place the red ring over objects to click them. you can click on:
Terry Filler Capital Allowance’s Focus Group
This cardboard app is available to iPhone and Android users.
Android
please download and install the app on your android phone

iPhone users
If you got this app message from apple test flight please download test flight install the app
Instructions
Please come along to the seminar session on the 2017 11 14 for the focus group
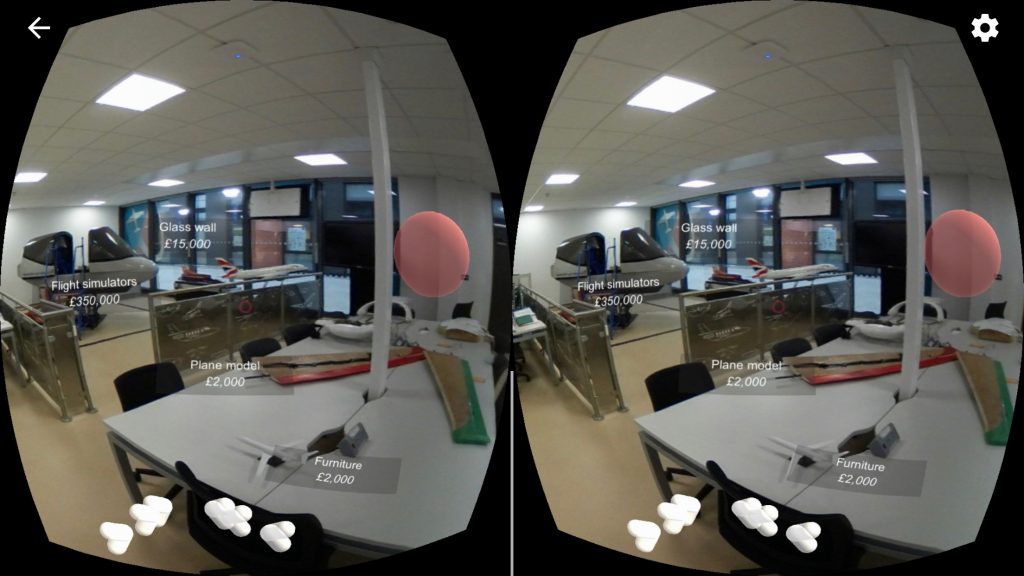
The app is a series of 12 photosphere taken around a training school and has overlaid costings. your aim is to identify the capital allowances possible to each item.
Controls.
Place the red ring over objects to click them. you can click on:
Photospheres unity project instructions
Version 1 of the Photosphere app is out!!!
https://github.com/SwanseaIMO/Tour360
Editing photos
For photos where photographer needs to be removed two photos must be taken without moving the camera and with the photographer in two different positions.
Open Gimp
Got to file->open as layers
Select the two photos (you can select multiple photos by holding down ctrl and clicking on each photo) and open them
In the window on the right side of the screen you will see both the layers, right click on the top layer select “add layer mask” and okay the settings
In the toolbox on the left side window select the pencil or the brush tool, and set the colour to black.
Now wherever you paint on the picture will show the layer underneath, so paint over the photographer to remove them from the scene
Once finished, navigate to File->export
Set the file type to jpeg and export the photo.
Stitching photos
The unity project requires equirectangular photos but the Samsung 360 outputs a double fisheye photo, to convert them we use the free tool gear360pano available from GitHub. To use this, you will have to install Hugin and if you intend to stitch video you will have to install ffmpeg and multiblend.
Download the gear360pao zipped file and unzip it in an accessible place.
Place the photos which need to be converted in the file
Open command prompt and navigate to the gear360pano folder, the easiest way to do this is to copy the file path of the folder and then in command prompt to type “cd” then press ctrl-v to paste the file path and press enter.
For individual images type “gear360pano.cmd nameofimage.jpg”
To convert all images in the folder type “gear360pano.cmd *.jpg” (any image already done will automatically be skipped)
The converted images are in html->data and will have _pano added to the name.
For videos the command is “gear360video.cmd nameofvideo.mp4”
And the videos are stored in the main folder with _pano added to the name.
Videos take a LOT longer than photos
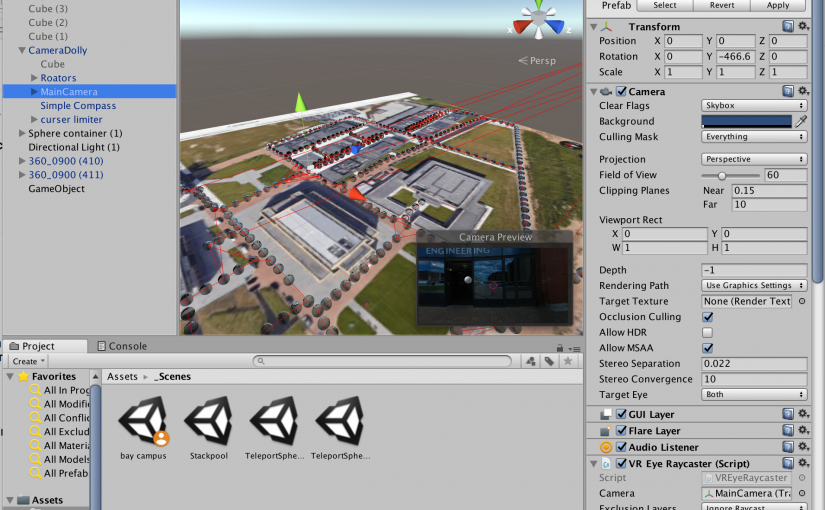
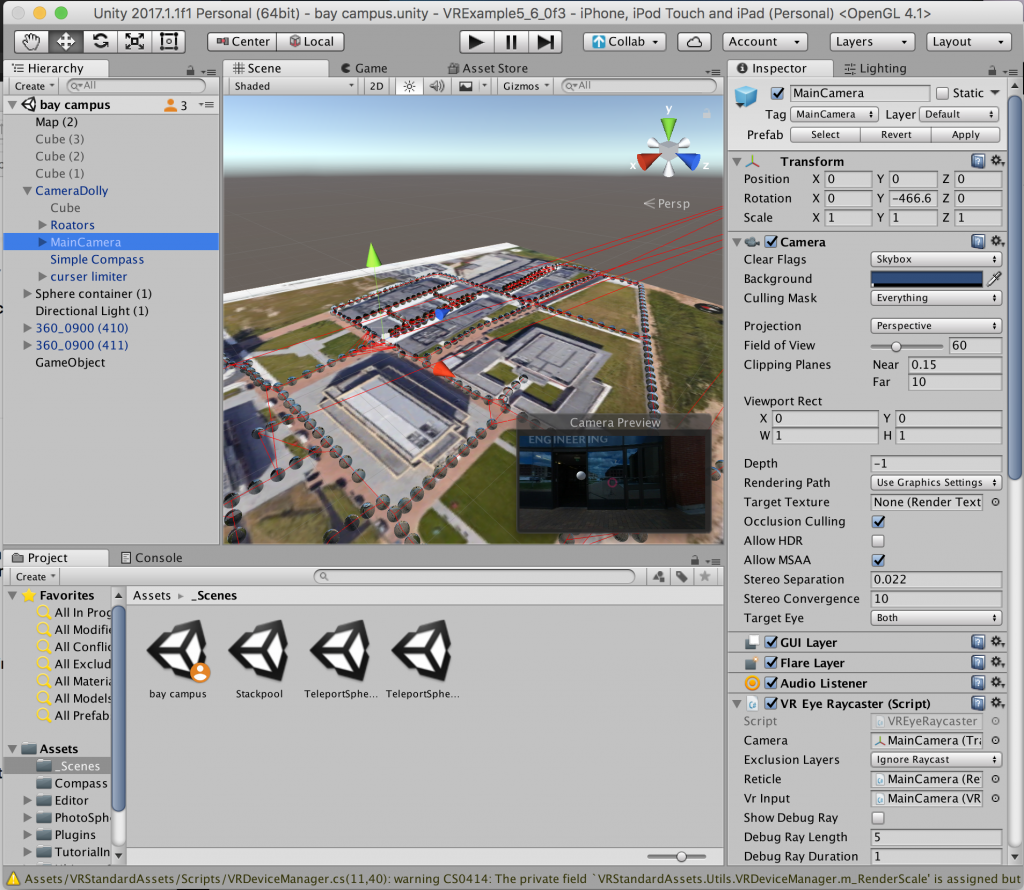
Starting a new scene
Delete the camera in the hierarchy window
To make a map
Right click in the hierarchy window and select 3D Object->Quad
Rename this to “Map”
With map selected, go to the inspector window, reset the location and change the x rotation to 90, this should position it flat. Change the y position of the map to -10, this allows the spheres to be located on y 0.
Increase the scale of the map in the x and y directions to a few hundred (you will be readjusting the scale again later)
To add an image to the map you must create a material using the image you want
First add the image of your map into the unity project
Then right click in the project window and select Create->Material.
In the inspector window with your new material selected change the shader to
Unlit->Texture.
Navigate to your map image in the project window and drag this into the material’s texture box.
Then drag your material onto the map quad in the scene.
Drag an instance of the prefab PSV4 into the scene and reset its y position to 0. You can then rescale the map such that the photospheres can be placed in the correct location without overlapping.
Position the photosphere on the map in the position where you would like the 360 tour to start, then drag the camera dolly prefab from the project window and place it in the photosphere in the hierarchy window so that it becomes a child of the sphere. Reset its transform so that it is in the centre of the sphere and then in the hierarchy window drag he camera dolly back out of the sphere so it is no longer a child. You are now ready to start placing more spheres and connecting them together.
Adding photospheres to the unity project scene
Import the converted 360 equirectangular photos into the unity project.
Navigate in the scene view to where you want the sphere to be placed, then drag an instance of PSV4 into the scene.
In the hierarchy window change the name of the sphere to something unique, a suggestion is the name of the photo you intend to put there.
Reset the transform y position to 0 and adjust the x and z position so the sphere is where you want it.
In the hierarchy window open the sphere and select the photoGimbal.
In the inspector, find the photosphere creation script, drag the photo you want from the project window into the photo selection box and click update sphere.
Rotate either the photoGimbal or the entire photosphere about the y axis so that the photo is in the correct orientation.
To connect sphere via teleports
Open the Photosphere and the open teleports in the hierarchy window.
Select one of the greyed-out switch to spheres and enable it by checking the box at the top of the inspector window, then scroll down to the teleport spheres script
Drag the camera dolly from the hierarchy window into the Dolly field and drag the target sphere into the Destination field, this will enable a one-way teleport to the target sphere, and a red line will be shown from the current sphere halfway to the target sphere.
Repeat the process from the target sphere to get a two-way teleport
The teleport little grey spheres themselves will automatically orient themselves to the correct positions based on where the photospheres are placed the first time the program runs, you can run the program in the project by pressing the play button. Once the camera loads press it again to stop and the teleports will be orientated.
TL;DR use Xcode to open Unity-iPhone.xcworkspace not Unity-iPhone.xcodeproj
While following this guide for building apps for iphones
https://unity3d.com/learn/tutorials/topics/mobile-touch/building-your-unity-game-ios-device-testing
I came across an error after I activated the PlayerSetting>iOS>Virtual Reality SDK + Cardboard
mach-o linker (id) error
after I did some searching I found
>I finally found out that i had to open the xcworkspace instead of the xcodeproj. Using the xcworkspace, there is a “Pods” that is added and compiled before the unity project.
If this is the solution for building an iOS build it would be nice to mention somewhere to use the xcworkspace instead of xcodeproj.
https://github.com/googlevr/gvr-unity-sdk/issues/539
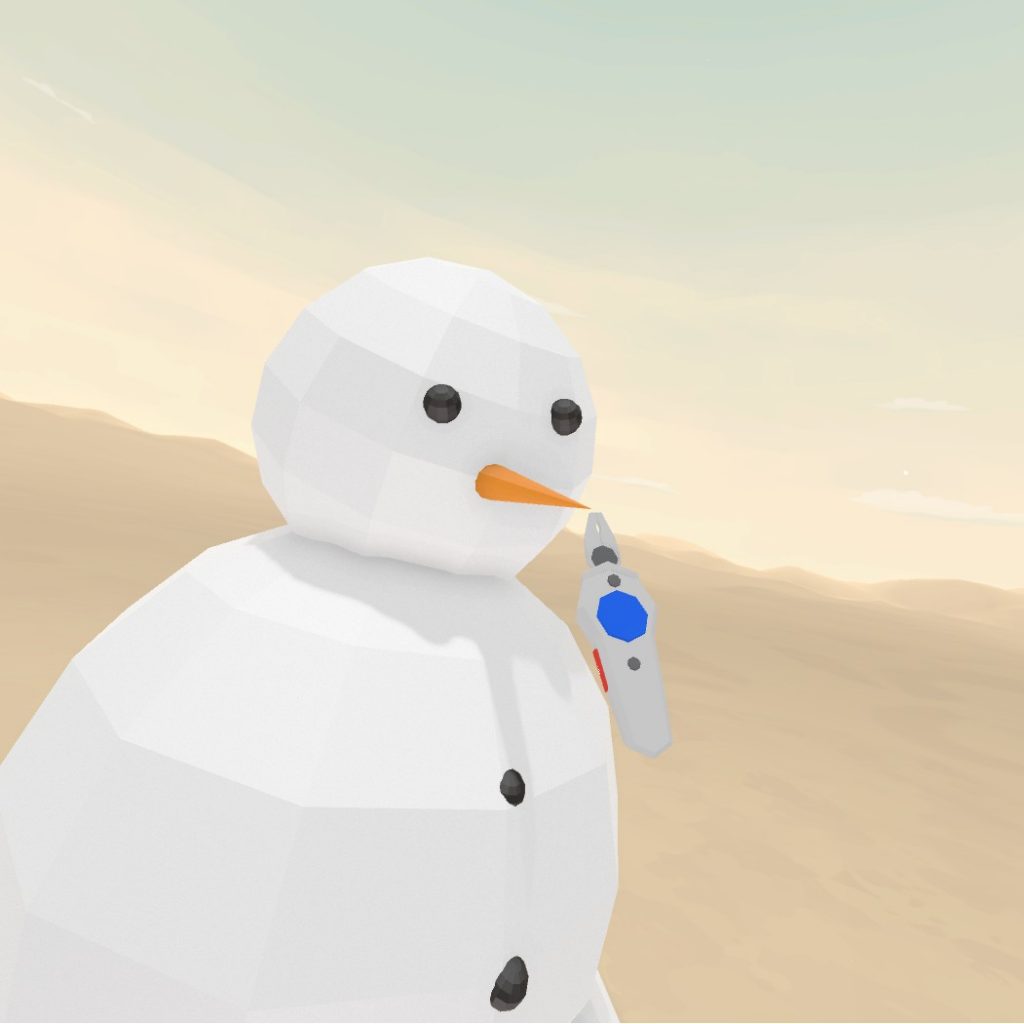
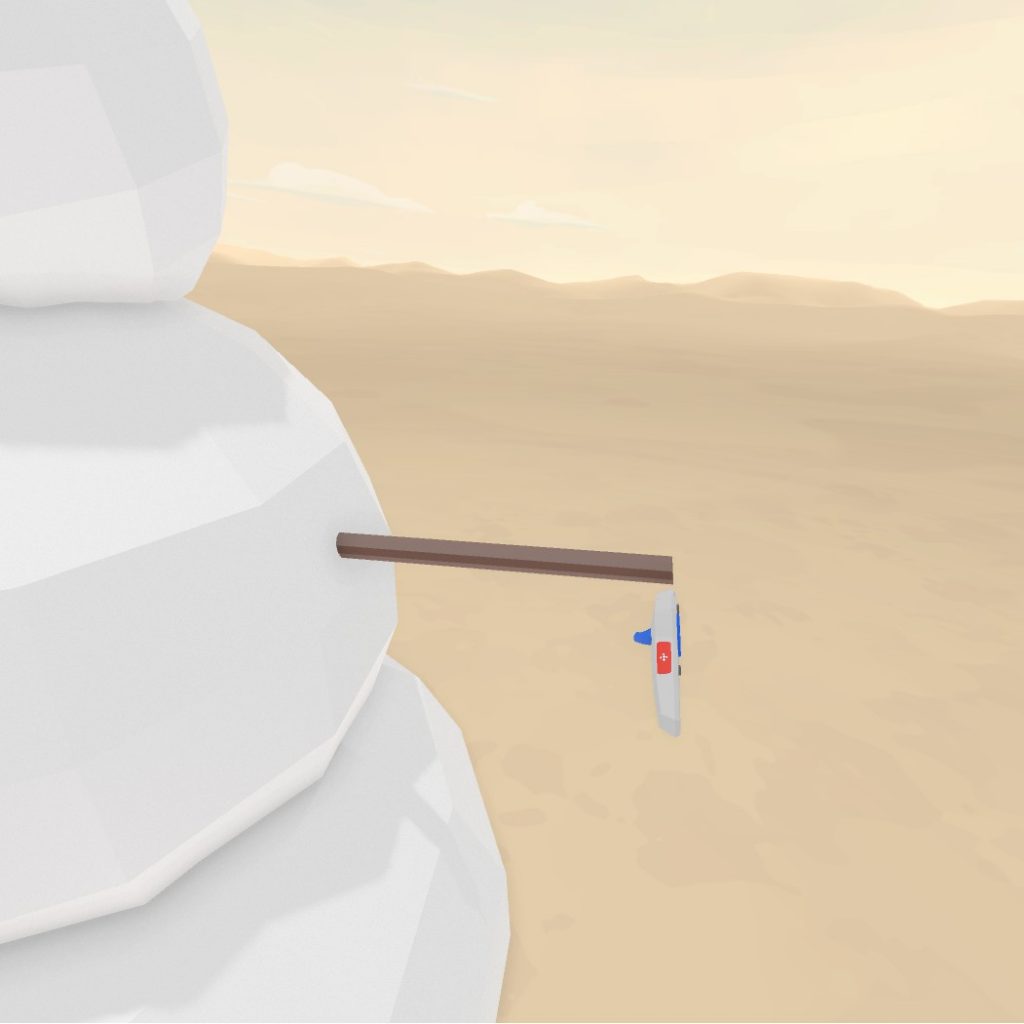
The recently released Google Blocks is a simple modelling tool designed around Virtual Reality. The modelling is based around placing simple shapes into the 3d environment, these can then be intersected and modified to create fairly complex low poly models.
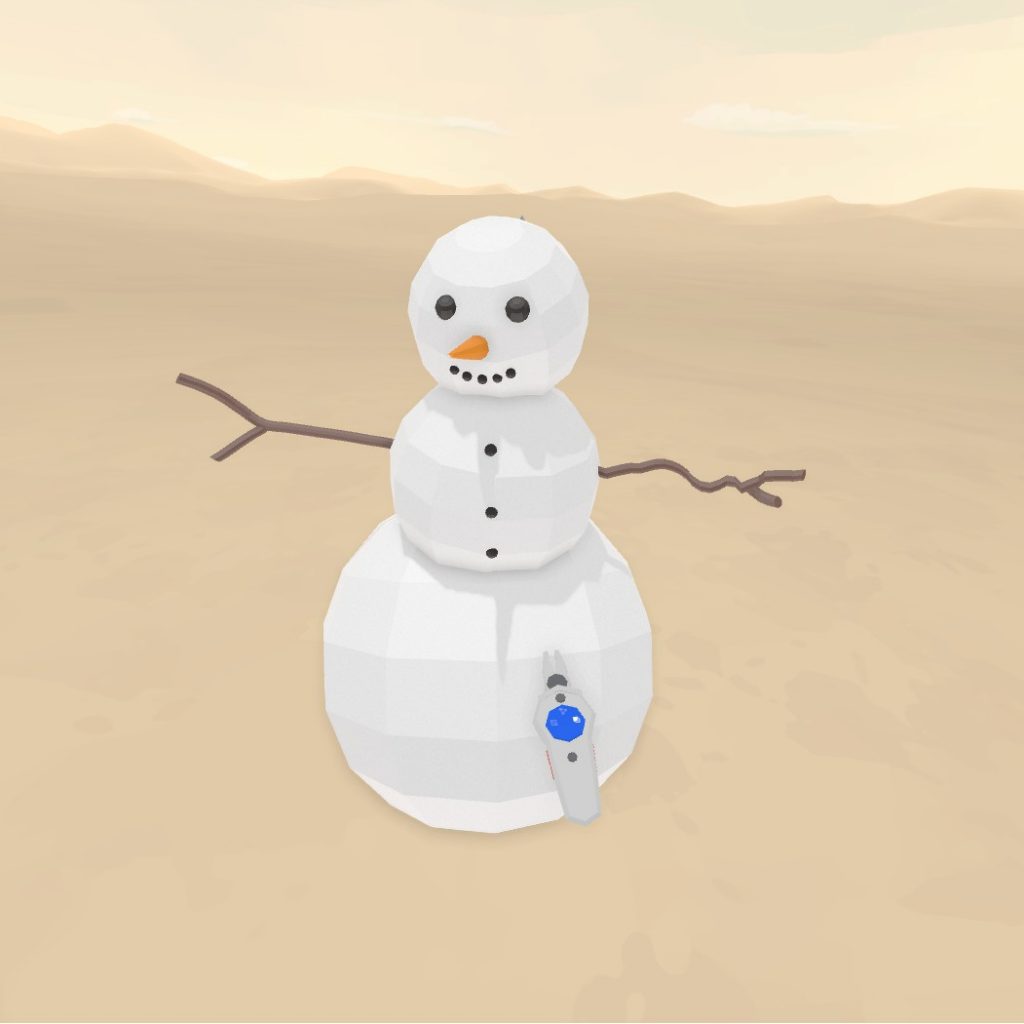
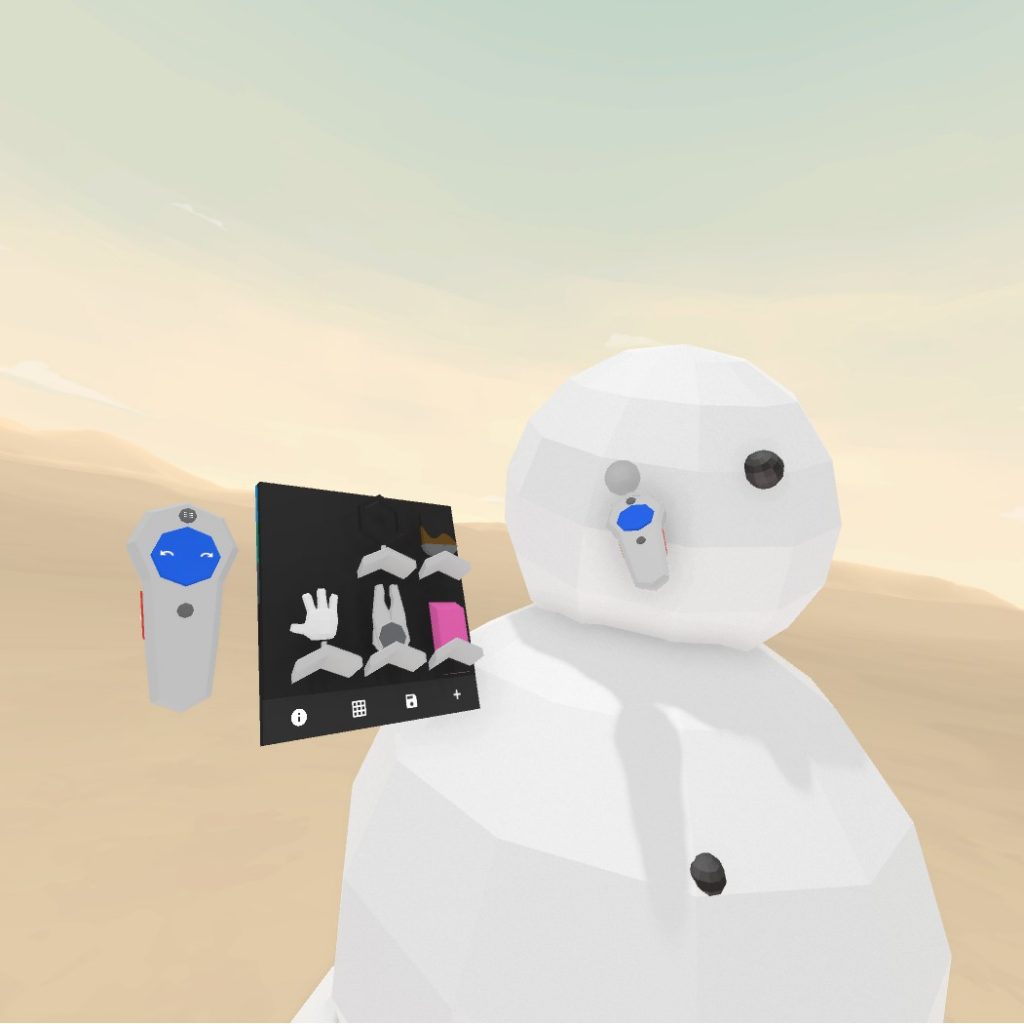
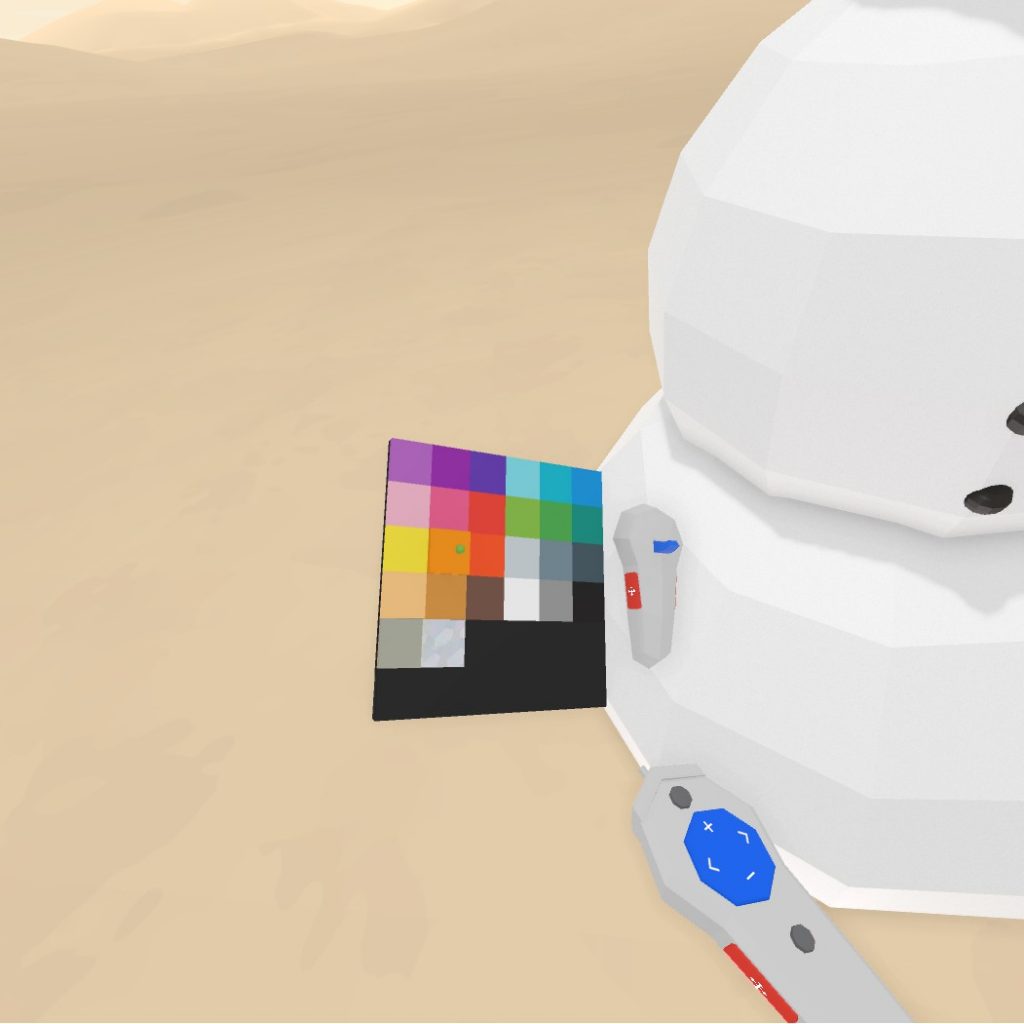
The advantage of Google Blocks is its simplicity, the interface uses only six modelling tools which are intuitive to use making it very easy to start playing around with. The models you create can be saved as .obj models to your documents folder, making Blocks a valid modelling tool. You can also publish your models to Googles site where they can be viewed and downloaded. A reference Image can be added into the environment which is a valuable tool if wanting to create more detailed models.
Unfortunately the lack of tools the makes google blocks simple is also one of its drawbacks, creating more complex models requires a creative mind to combine and modify the given shapes into what you want, Google Blocks definitely fits Bushnell’s law: Easy to learn, difficult to master.
Overall Google Blocks is a great tool for anyone to get a taste of 3D modelling and can be used to create great low poly models, the limit being the creativity of the user in how they combine simple shapes to create their models.